I was curious to test the button, SAVE AS DRAFT present in the Edit Post page of the Blogger. I had not used it all so far. So, after publishing a post I clicked the edit mark (pencil) shown in the blog below the post. And in the Edit Post page I clicked this button, SAVE AS DRAFT. My post disappeared from both the Edit Post page and the blog page itself! Now I was shown the post saved in the Manage Post of the Dash board as draft! To retrieve the disappeared post I clicked on the title of my post (showing the word ‘draft’ next to it). But I could not get the post in Edit Post page. And I tried on and on all other underlined texts found there and failed. So, I went to Create Post and entered all the post’s contents once again and published it again. Then I returned back to the Manage Post page to investigate, and found out the mistake: I didn’t check the Check box and clicked the Edit button placed before the post title! So, do not leave out anything before you leave off any work so that you can save your time.
Friday, July 18, 2008


Monday, July 14, 2008
A much Easier(!) and Amusing Paint!
There is complexity in using the MS Paint Programme by all. It may take a longer time to complete the paint work in it and to get a total satisfaction out of it. There is another Paint programme called Tux Paint meant for the kids. But it is both easier and amusing to all the ages. Astonishingly it provides you a neat work result and the expected satisfaction! You can try it out yourself by downloading it to your computer.
Friday, July 11, 2008
Honey, I Shrunk the Pictures!
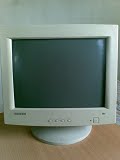
In this blog I displayed first my computer’s picture just below the blog’s title. But it was too large. I could not shrink its size to fit in the Picture Page Element of the blog’s Lay out. So, I removed it with disgust. Later on I tried a way to do this job and found it successful. I simply right clicked on the picture of the computer present in the computer folder. The picture opened in Windows Picture and Fax Viewer. Next I went to proceed as follows: Right- clicking on the picture --> Open With --> Paint --> Images --> Stretch/Skew --> Stretch--> Entering in lesser but equal % in both Horizontal and Vertical boxes--> clicking OK button. Now I got the computer picture reduced in size, moderately. I selected the picture and saved as Bitmap (bmp) file in a file. Then I uploaded it easily to the Picture Page Element of the Lay Out where I could shrink it to the smaller size. You can now see the minimized pictures of the computer below the blog’s title and at the starting place of this post!
Subscribe to:
Posts (Atom)
About Me

Tweeting


This work is licensed under a Creative Commons Attribution-Noncommercial-No Derivative Works 2.5 India License.